BESPOKE DISABLED MOTORCYCLE ADAPTATIONS
Every Kliktronic installation has to be approached as a completely different exercise; however, there are certain guidelines which must be observed if the unit is to operate effectively.

The majority of selector pedals are made of aluminium. Whilst easily drilled and tapped to accept fixings they are less easily modified or extended unless you have access to TIG welding facilities. It is, therefore, best to utilise the lever in its existing form if possible.
The measurement taken here ensures that the full stroke of the Kliktronic is taken up. Because of the way the system operates, it is important for optimum performance that the maximum power of the unit is made available by choosing the correct stroke.


Having found the point along the lever where the 25mm stroke operates the gear change, this is then checked using the spring balance. This ensures that the effort required is within the range of the Kliktronic system. In practice the unit will comfortably cope with even the heaviest of boxes, such as Harley Davidson.
There are two distinct measurements to take: the effort required to overcome the return spring, and the somewhat heavier loading required to rotate the selector to the next gear. The range of operation for the Kliktronic is approximately 12lbs at the start of the stroke and close to 40lbs at the end.
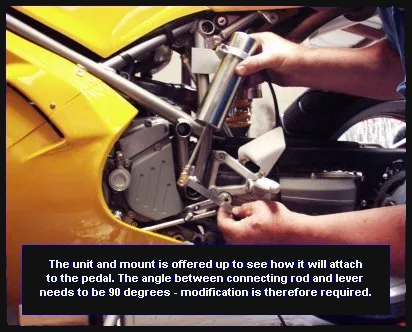
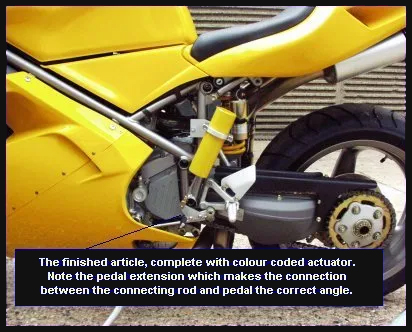
In order to produce the maximum force in both directions, the connecting rod to the Kliktronic actuator must be attached as near as possible at 90 degrees to the lever. It can be seen from this photograph that the lever needs altering to achieve this requirement.
Sometimes where the lever connects directly to the spigot on the gearbox, it is a simple matter of repositioning the lever on the shaft. However, in this instance, an extension piece was made for the lever to raise the connection point accordingly.
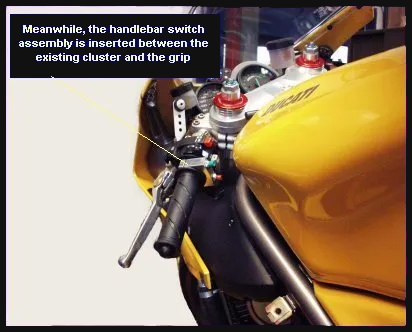
The switch assembly is usually located so as to fall under the thumb of the clutch hand. In this instance the existing switch array was moved along the bar to accommodate the Kliktronic switch.
The majority of bars are 7/8'' diameter, although occasionally you will find 1'' bars. Our unit is available in either size.
The final position of the buttons is down to personal choice and the position of existing buttons.
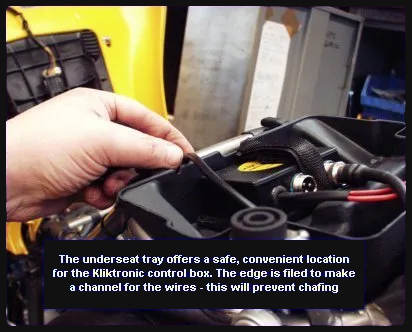
Here the control box is mounted under the seat. In this instance we are fortunate that the tray is just the right size to accommodate the box. Whilst the box is reasonably watertight it is always best to choose a sheltered spot for it.
The connections to be made are battery positive and negative plus an ignition switched supply. This was picked up from the back of the fuse box which was easily accessible.
Both actuator and switch connections are of the locking DIN connector type. One is 3 pin, the other 4 - so that they cannot be confused.
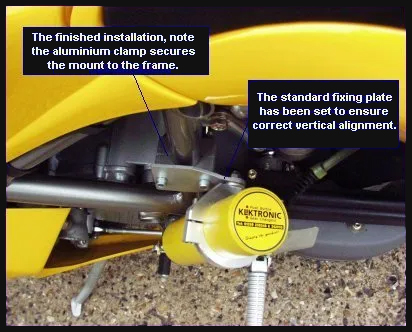
While the electrical connections were finished and neatly tie wrapped, the actuator was installed with the new clamp and adjusted.
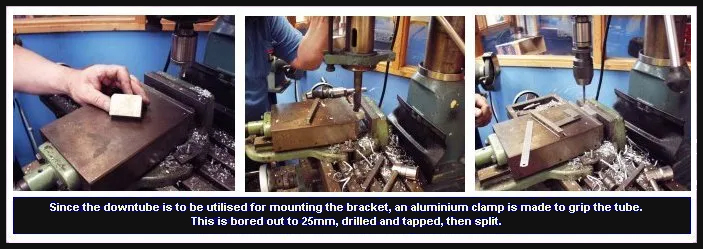
It can be seen that the standard fixing plate has been bent slightly. This is because the frame member to which the clamp is attached is not parallel to the pedal. This would have resulted in the connecting rod running out at an angle.
The slight twist ensures that the rod runs vertically in line with the rise and fall of the pedal.
The finished installation. The rider of this machine has had a left foot amputation, but thanks to the Kliktronic unit will still be able to use the machine for track days. In fact the machine was raced the following day, the owner's comments as follows: -
"Thanks for all your help fitting the Kliktronic. We had a good day at Donington despite the weather doing its best to dampen our spirits. I'm pleased to report that the gear changer worked perfectly throughout the day never missing a gear."
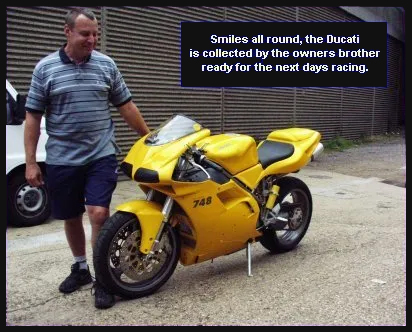
All told this installation took 5 1/2 hours. Obviously since this was the first 748 we had done, the job will be easier next time. Anyone looking at this article will also have the benefit of clear guidelines for any future Ducati 748s.
There are a wide selection of photographs in our gallery section. However if you have a machine, are thinking of installing a Kliktronic or would like some guidance then simply send us a photograph and we will endeavour to offer suggestions on the best method of fitting.
